Using Sanity CMS to host an image gallery for an existing 11ty site
March 26, 2022
I've seen a few tutorials now on using Sanity CMS with Eleventy, but they all assume I want to use the Sanity/Eleventy starter project, not an Eleventy site I already have. cassey.dev is built on Eleventy, and I don't want to start my whole project over. But, I was pretty convinced by Hidde de Vries's reasons for trying out Sanity as a CMS with Eleventy for photo blogging, namely the ability to easily add photos from mobile without futzing with git, and hosting the images somewhere where my data is not the product. So, I set about adding images hosted on Sanity CMS to my existing Eleventy site.
You can see what I came up with at Casseygram, and all the code that went in my initial setup in this PR.
# This post might be for you if:
- you already have an Eleventy site and know the basics of using Eleventy
- you might not be familiar with Sanity CMS yet
- you'd like to continue to use a git workflow to manage posts on your site and the majority of your site's content, but want to add a collection of images hosted in a mobile-friendly CMS to your site.
Reading Hidde's post is not required, but might give you more helpful context on how Sanity works. I'll be moving a bit fast through the overview and focusing on just what you need to know to get running, leaving you to explore what Sanity offers and how it does it on your own.
Here's what I did, so you can try it, too.
# Create a new Sanity project
- In your terminal, make a new folder, and
cdinto it - Run
npm install -g @sanity/cliand thensanity init. This will open a command line interface for setting up your account with Sanity. - Log in with something, then select "Clean project with no predefined schemas" when that appears as one of the prompt options.
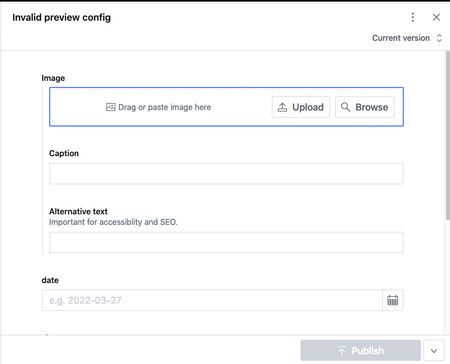
Note that if you use the default configuration with just theproductiondataset, any data you change when you're running Sanity Studio locally will be reflected everywhere - that is, in your production dataset, and eventually, on your site. Keep that in mind once your Eleventy integration is up and running and you come back to make more adjustments - don't add test data you'd rather not see on your real site! - We'll want to add one basic document type and one object to Sanity - an object to represent just an image with alt text, and a document to add some additional fields. To do so, we'll add two files:
// schemas/documents/imageHolder.js

import {format} from 'date-fns'

export default {
  name: 'imageHolder',
  type: 'document',
  title: 'Image Holder',
  fields: [
    {
        name: 'blogImage',
        type: 'blogImage',
        title: 'Image',
        options: {
          isHighlighted: true // <-- make this field easily accessible
        }
      },
      {
          name: 'date',
          type: 'date',
          title: 'date',
          validation: Rule => Rule.required(),
      },
      {
        name: 'slug',
        type: 'string',
        title: 'slug',
        validation: Rule => Rule.required(),
      }
  ],
  preview: {
    select: {
      media: 'blogImage',
      date: 'date',
      slug: 'slug',
    },
    prepare ({date, slug, media}) {
      return {
        title: media.alt,
        media,
        subtitle: `${date}-${slug}` || 'Missing date'
      }
    }
  }
}
// schemas/objects/blogImage.js
export default {
    name: 'blogImage',
    type: 'image',
    title: 'Image',
    options: {
      hotspot: true
    },
    fields: [
      {
        name: 'caption',
        type: 'string',
        title: 'Caption',
        options: {
          isHighlighted: true
        }
      },
      {
        name: 'alt',
        type: 'string',
        title: 'Alternative text',
        description: 'Important for accessiblity and SEO.',
        validation: Rule => Rule.error('You have to fill out the alternative text.').required(),
        options: {
          isHighlighted: true
        }
      }
    ],
    preview: {
      select: {
        imageUrl: 'asset.url',
        title: 'caption'
      }
    }
  }
The Sanity project initializes itself with a file at schemas/schema.js. We need to import our two new files there, and add the objects exported from those files to the types array.
import blogImage from './objects/blogImage';
import imageHolder from './documents/imageHolder';
  types: schemaTypes.concat([
    /* Your types here! */
    blogImage,
    imageHolder,
  ]),
-
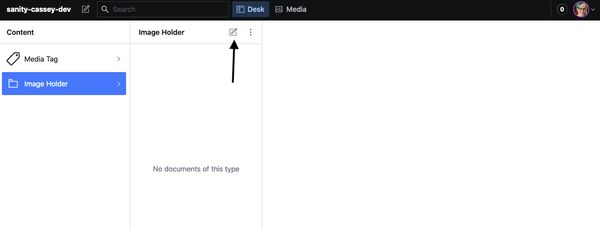
Sanity Studio's web ui at this point of the process should have a Content column with Image Holder as an entry, and not much else. If everything is looking good when you run
sanity startto preview your studio locally, go ahead and dosanity deploy. This tells Sanity to host a version of your Studio for you on the web, which you can use to update content from mobile. (the dream!!) Later we'll add a webhook to re-build/re-deploy our site whenever a document is added. -
Add an image or two for now so we have something to see when Eleventy queries our Sanity dataset.
- Click on your profile image in the top right corner of Sanity Studio (on localhost or the production instance you've deployed; both will take you to the same URL) and click "Manage Project" in the dropdown that appears. Go to the API tab and click "Add API token" to create a token we can use in our Eleventy site to request our content from Sanity.
Okay, that's the Sanity side.
# Access Sanity from your existing Eleventy project
-
Over in your Eleventy project, install the Sanity dependencies, and dotenv for environment management if you don't have it already:
npm i @sanity/client dotenv @sanity/image-url groq dotenv -
Add a .env file if you don't have one. In that file, add these three lines:
SANITY_PROJECT_ID='your project id'
SANITY_DATASET=production
SANITY_READ_TOKEN='your token'
Your Sanity project ID can be found in the header info in the manage project page where we created the API token.
If you weren't already using dotenv, make sure to initialize it by adding require('dotenv').config(); to the top (outside the config function) of .eleventy.js. Also be sure to add .env to your .gitignore so you don't check any secrets into your repo.
- Add a folder called utils/ if you don't have one, and create a file in it called
sanityClient.js.
// utils/sanityClient.js
require('dotenv');

const sanityClient = require("@sanity/client");
const sanity = {
    projectId: process.env.SANITY_PROJECT_ID,
    dataset: process.env.SANITY_DATASET,
    apiVersion: '2022-03-27'
};

module.exports = sanityClient({...sanity, useCdn: false, token: process.env.SANITY_READ_TOKEN});
- In your
_datafolder (create it if you don't have one), add a file calledimages.js, or whatever you'd like your images from Sanity to be called in Eleventy's global data.
Put this code in it:
// _data/images.js
const groq = require("groq");
const client = require("../utils/sanityClient.js");
const imageUrl = require("@sanity/image-url");
function generateImageData({ blogImage, date, slug }) {
return {
image: `
.image(blogImage)
.width(300)
.url()})`,
caption: blogImage.caption,
date,
slug,
};
}
async function getImages() {
// Learn more: https://www.sanity.io/docs/data-store/how-queries-work
const filter = groq`*[_type == "imageHolder"]`;
const projection = groq`{
blogImage,
date,
slug
}`;
const order = `| order(date desc)`;
const query = [filter, projection, order].join(" ");
const docs = await client.fetch(query).catch((err) => console.error(err));
const preparePosts = docs.map(generateImageData);
return preparePosts;
}
module.exports = getImages;
This is using the Groq query language, which can be confusing at first. Sanity Studio has a Groq query playground available when running locally - it's in the tab named "Vision" on your local instance of the Studio.
Basically, here we are asking Sanity to give us all the documents with the type imageHolder, and making sure we have access to the blogImage, date, and slug properties on each document.
Ok! At this point, when you run the build, you should be getting the images from Sanity, and they should be available to your layouts, accessible using the name of the file you created in _data without the extension. (Mine is just images)
# Create some pages to show the images
I want to display all my images in bulk, so I am using Eleventy's pagination feature to create page with 20 images at a time.
---
pagination:
    data: images
    size: 20
---

<ul>

{%- for item in pagination.items %}
    <li>
        <a href="/casseygram/{{ item.date }}-{{item.slug}}/">{{item.image | markdownify | safe}}</a>
        <p>{{ item.caption }}</p>
    </li>
{%- endfor %}

</ul>
The markdownify filter converts our Markdown-formatted image tag to HTML. The safe filter tells the template engine to actually render the HTML, not just display it as a string.
Pagination navigation, which means generating links to each of the pages of 20 images, is out of scope for this tutorial. Check the official docs for that!
I also want to generate a standalone page for each individual image, which I can also do with pagination, using size=1.
---
pagination:
    data: images
    size: 1
    alias: thisImage
permalink: "casseygram/{{ thisImage.date }}-{{thisImage.slug}}/index.html"
---
{{ thisImage.image | safe }}
{{ thisImage.caption }}
Note that I'm creating a URL for each image based on a short slug and a date, both of which I set explicitly in Sanity. I don't expect having too many photos on the same day, so I'm trusting myself not to give two images the exact same slug, which would cause a build error and prevent my site from updating properly until it's fixed.
# Re-build the site when a new image is added
I thought I'd have to write more Groq here, since Sanity calls them "Groq-powered webhooks", but actually there was a nice form UI in the Manage Project / API section of Sanity that handled most of the configuration. I just added _type == "imageHolder" in the Groq section.
# Conclusion
Okay, that's it! You're hopefully off to a great start with this and ready to customize your CSS and layout.
Webmentions: None yet!
These are webmentions via the IndieWeb and webmention.io.